Broom Finishes: More Than Just Slip Resistance
May 16, 2025
When most folks think of broom finish concrete, they picture the standard gray sidewalks and driveways we see just about everywhere. And sure, broom finish is the workhorse of concrete finishing — but it doesn’t have to be boring.
What Is a Broom Finish?
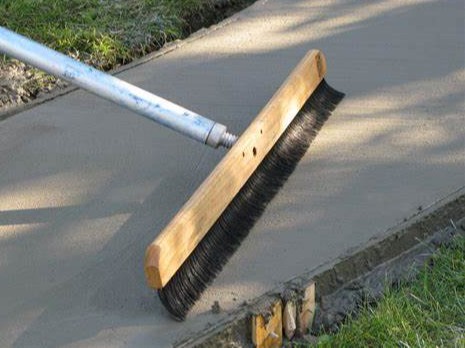
A broom finish, sometimes called a brushed finish, is exactly what it sounds like: dragging a broom across the surface of freshly placed concrete to create texture. That texture gives the slab a slip-resistant surface, making it ideal for patios, driveways, walkways — anywhere safety and traction matter. It’s a method that’s been used for decades, and for good reason.
Pros and Cons
The biggest pros? It’s affordable, durable, easy to apply, and keeps people from slipping — especially in wet conditions. But like anything, it’s got its trade-offs. The surface can be tough on bare feet, it’s not the fanciest looking finish out there, and sometimes it traps dirt or shows color inconsistencies.
Timing Is Everything
If you’re going to get a broom finish right, timing is key. You’ve gotta wait until the bleed water’s evaporated, but before the surface gets too hard. That window usually lands somewhere between 20 minutes to 4 hours after you pour, depending on the weather and mix. Miss that window, and you’re either dragging the broom through soup or scratching up a crusty slab.
The Brooming Process
Here’s how I do it:
-
Pour the slab
-
Strike it off and bull float it
-
Let it sit until the bleed water’s gone
-
Then, I broom it in the direction I want the texture
-
After that, I make sure it gets properly cured
Types of Brooms
Not all brooms are created equal. You’ve got stiff bristles, soft bristles, horsehair, nylon — the type you use can make a big difference in the final texture. Some newer broom systems even let you adjust the angle and depth of the texture, giving you more control over the look.
Now Let’s Talk About That “Boring” Finish...
Let me tell you something — just because broom finish is common doesn’t mean it has to be plain. I’ve got a technique I like to use that adds a high-end touch while keeping the benefits of a traditional broom finish.
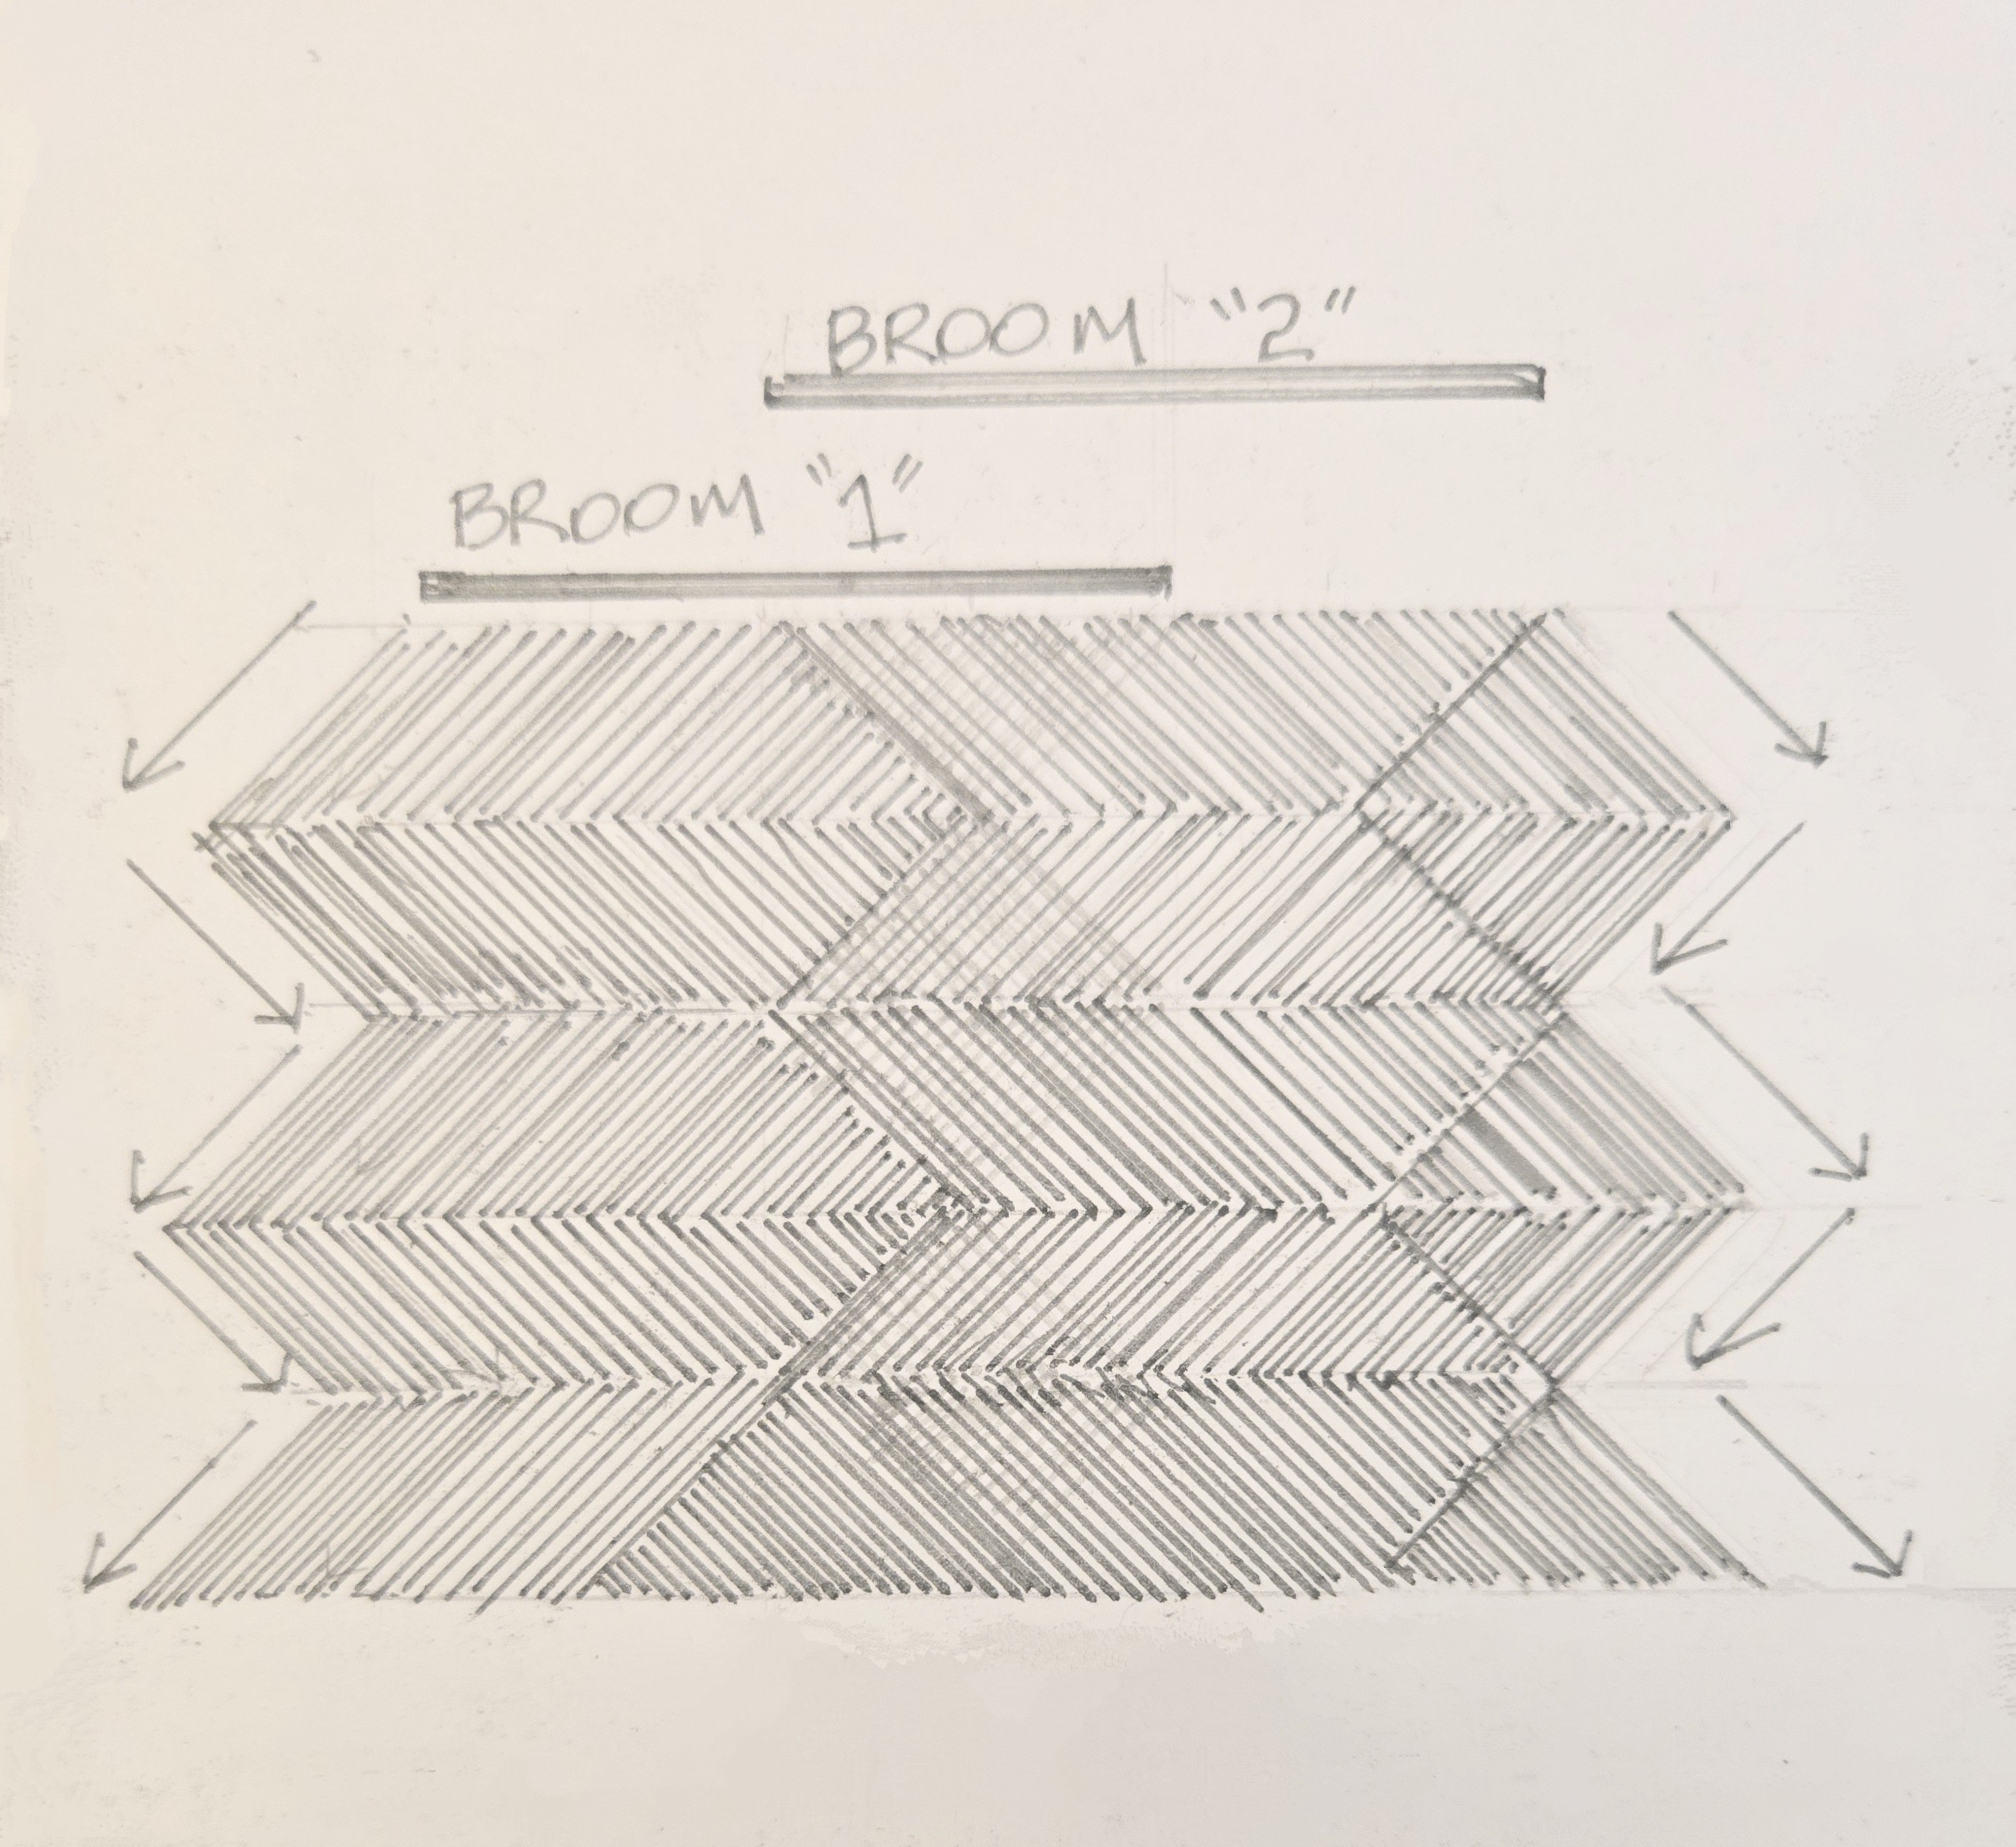
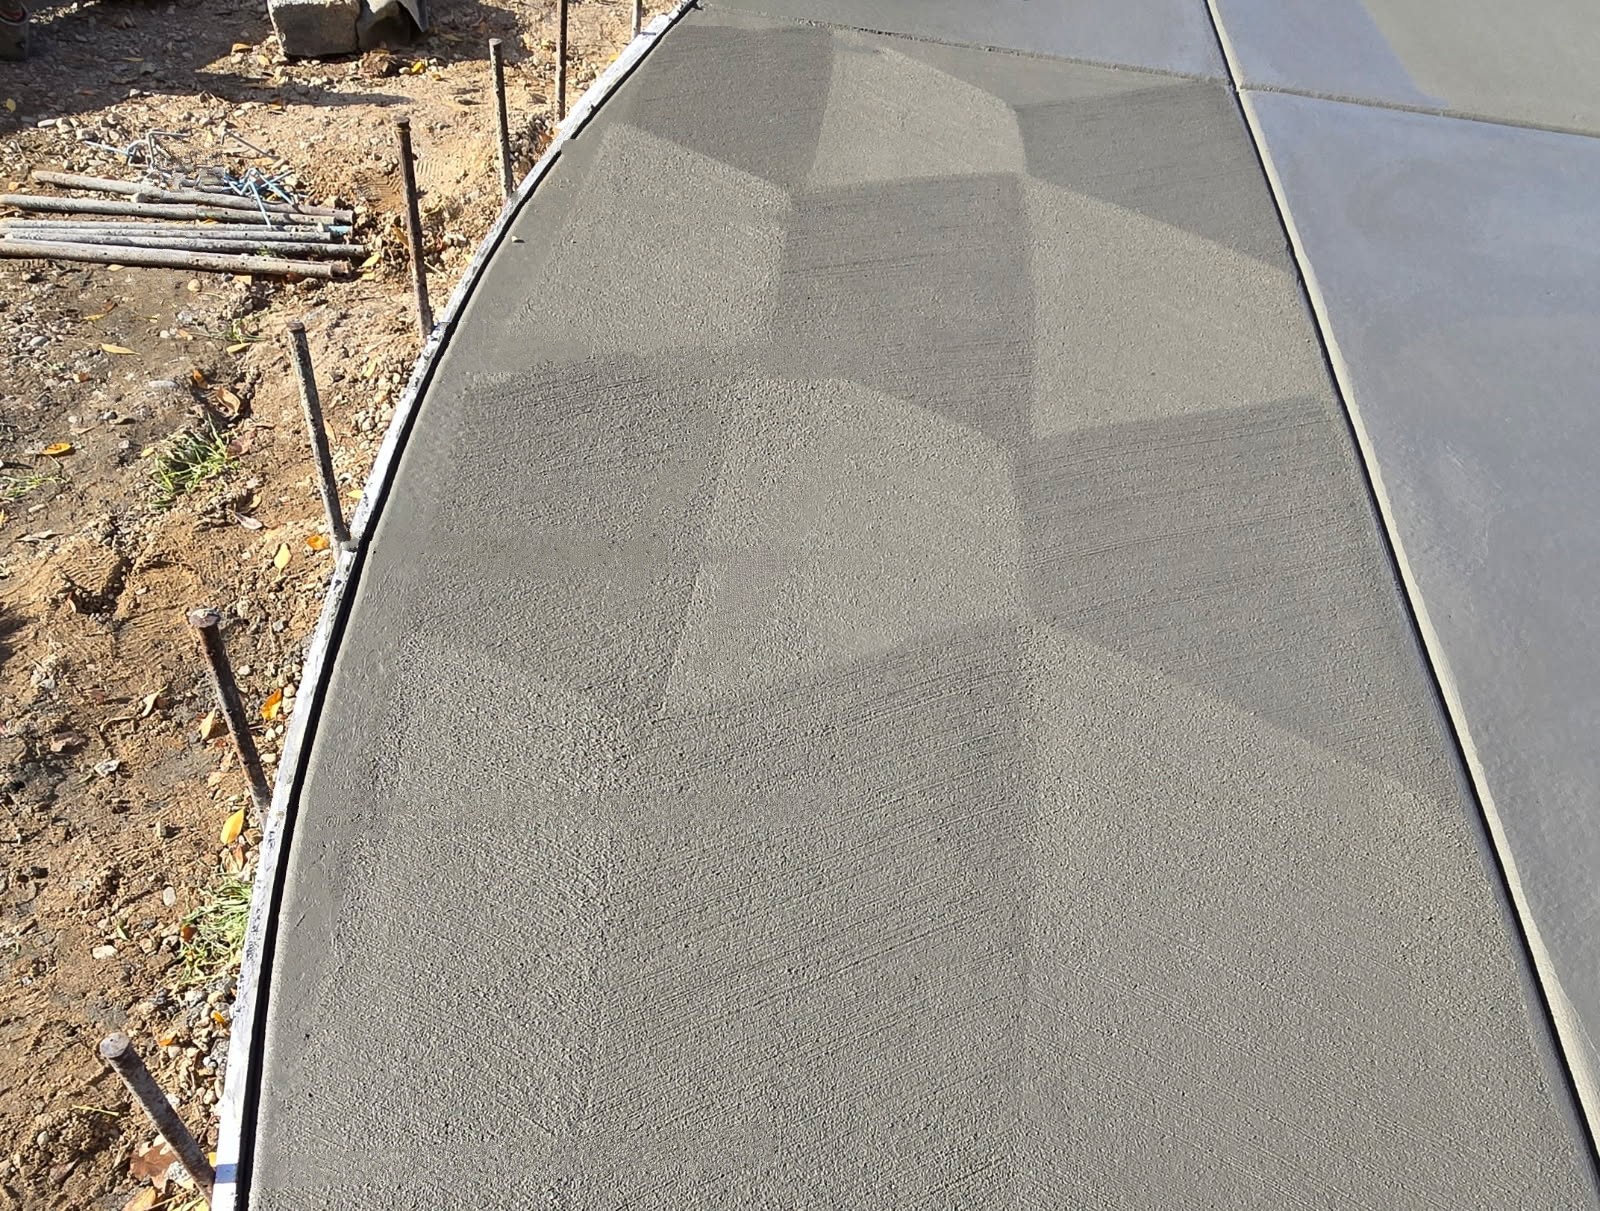
I call it the hexagon broom pattern.
It’s clean. It’s classy. And if done right, it catches the light in a way that looks like art. Best part? You can charge close to stamped concrete prices for it — without the extra steps or labor.
How It Works
I use a 4-foot broom for this. Here's the process:
-
First Pass: Start at a 45-degree angle. Run the broom so the far edge of the broom lands one foot from your starting point.
-
Keep It Square: Make sure that 45-degree angle stays straight and square across the slab.
-
Second Pass: Now offset your next broom stroke one foot inside the first. Repeat that offset every pass.
-
Stay Consistent: Pay attention to the ends of each broom stroke to keep your lines sharp.
It takes a little practice to nail it, but once you get the rhythm down, this pattern becomes a real showstopper. I’ve had clients choose this over stamp — not because it’s cheaper, but because it looks that good.
If you’re in the concrete game and you’re not experimenting with finishes, you’re leaving money on the table. Don’t settle for plain when you can stand out — with nothing more than a broom and a little know-how.
Keep learning. Keep leveling up. Keep pouring with purpose.
— Rick Smith
Stay connected with news and updates!
Join our mailing list to receive the latest news and updates from our team.
Don't worry, your information will not be shared.
We hate SPAM. We will never sell your information, for any reason.
